Showing posts with label Raised beds. Show all posts

Thursday, 7 April 2016

Spoonie Veg: growing in raised beds and containers

After publishing my introduction to Spoonie Veg post, I received some really interesting and helpful perspectives from readers, both on my blog and in Twitter conversations. One thing that came out of this was that I realised a post on where to grow your fruit and veg might be useful, before starting on individual plant posts. As Michelle said 'spoon ratings may apply to techniques as well as particular veg'. Therefore, based on my experience and some tips from readers, this is an overview on growing in raised beds and containers.

My raised beds in the kitchen garden area, looking barer but neat at this time of year

Raised Beds (Spoonie Veg rating of 1-2, but could go up to 4-5)
In all honesty, I really think the easiest way to grow if you have room, (whether you have a chronic illness or not), is by using raised beds. Yes there is the initial work in getting them set up which is Spoon-heavy, I confess. But, with help, once done they are much easier to manage.

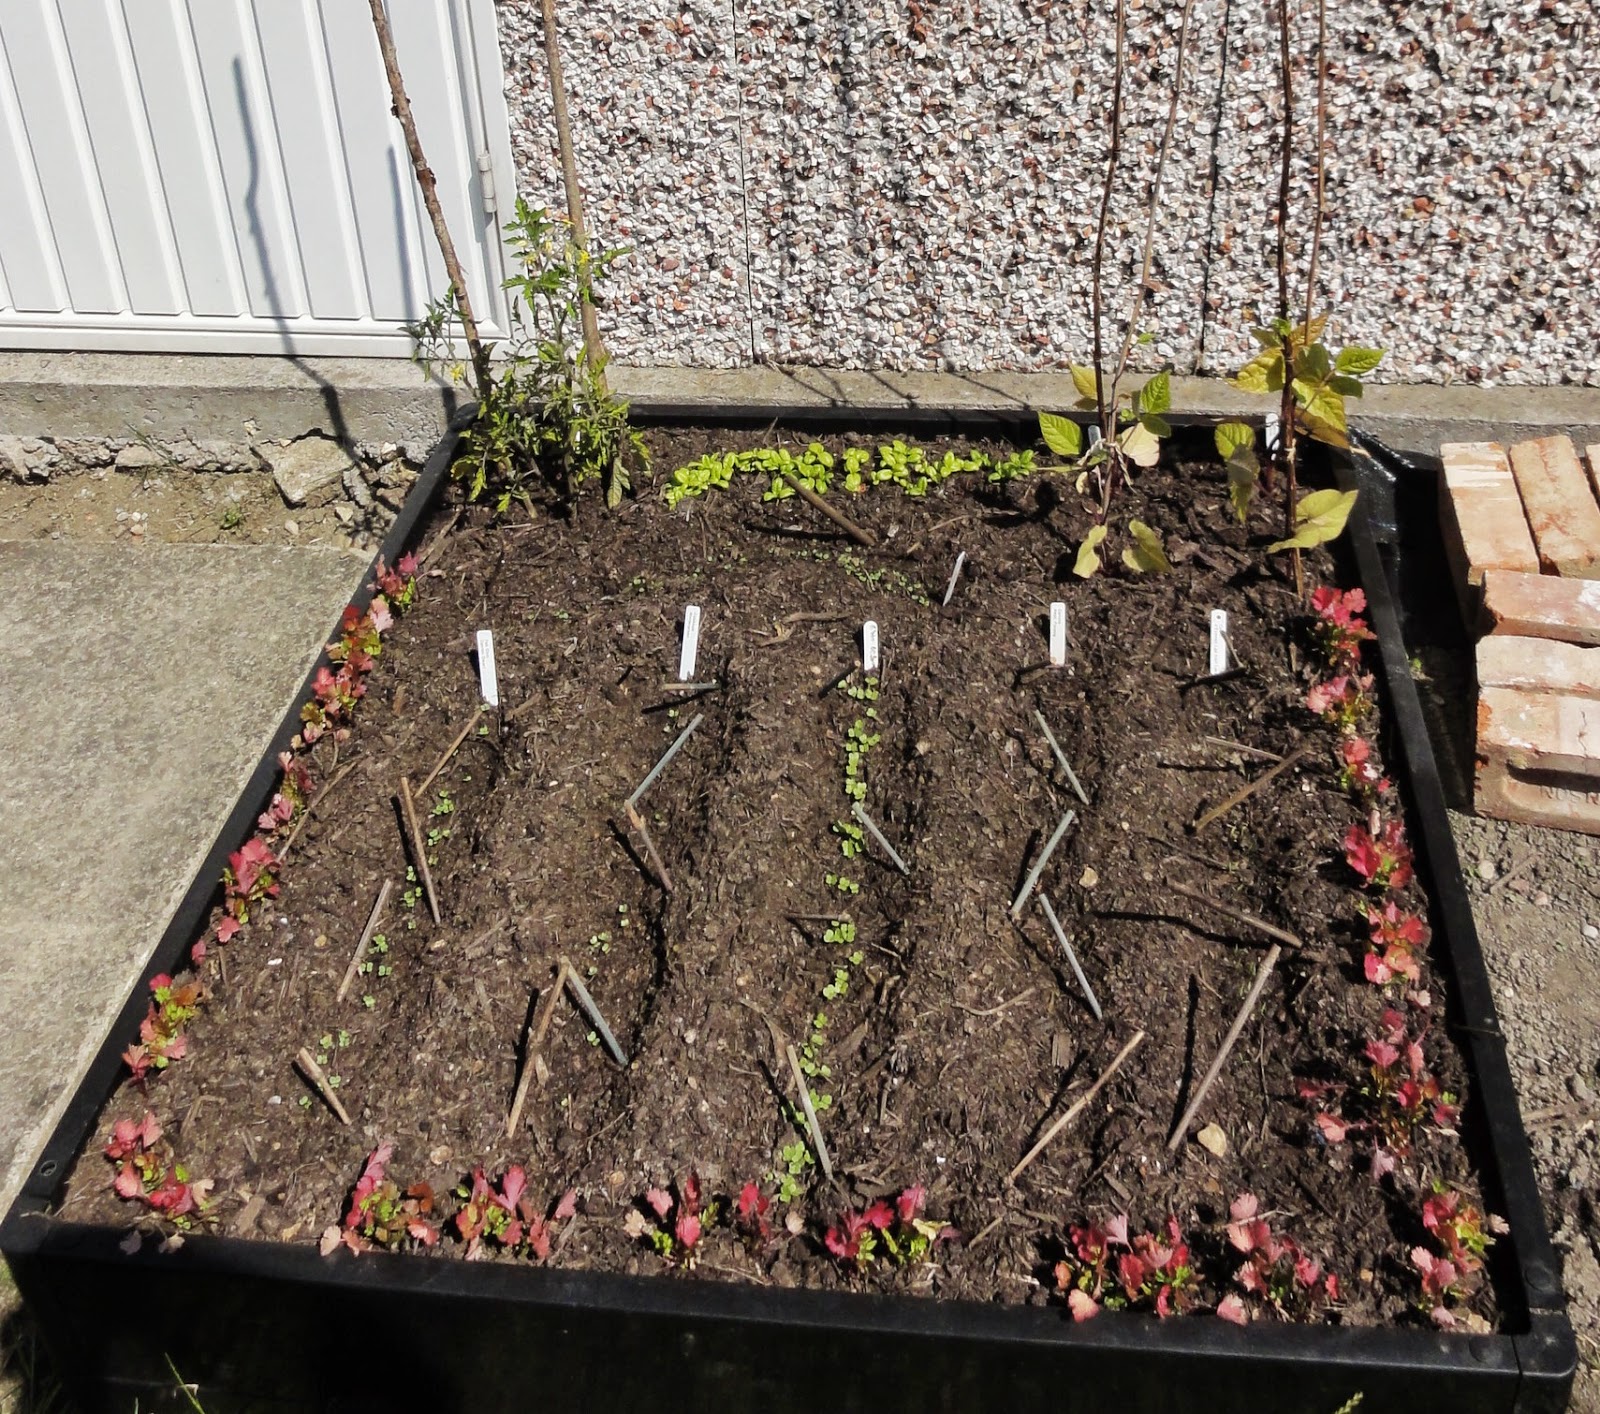
I use Link-a-bords, which are made from 98% recycled uPVC. Whilst they aren't as attractive as sleepers or wooden borders (see picture above, from my garden this week), they are easy to put together and basically need no maintenance, the latter a big plus in my view. They are also an easy way to implement a no-dig* regime and I have found they really do keep weeds to a minimum.


The 'con' is that you do needs funds for the initial outlay, so if that's an issue, going through local skips for wood that is being thrown away is a cheaper option. But then you need the Spoons to scavenge, you may need access to a car to cart your wood home, etc. Like everything with a chronic illness and a tight budget, you have to weigh up your options and spoons.

As an example, I use Link-a-bords to 45cms high (3 levels). The advantage of building them up to this height is:
a) getting more light (and warmth) onto the beds for a longer period of time;
b) because my soil is acidic, I need a decent depth to add in compost for growing vegetables, which need alkaline soil;
c) it's means less leaning and therefore is better for my back. Less leaning is also less spoons.

My raised beds last July, looking better with lots of plants and food growing

Michelle also finds raised beds are much easier to cultivate on her clay soil and I think that's a good general point about clay soil. Why spend so much time and spoons digging and then trying to improve the heavy clay soil, when you can build raised beds on top of it and add in all the good compost and manure that way.

Helen Gazeley also suggested that putting in an irrigation system can also reduces spoons. This is something I hadn't thought of when I designed my garden, and I wish I had. This would remove a lot of time and spoons you need to spend on watering, as it's just a case of turning on and off a tap. Something to seriously consider if you are planning a new garden. When I have the funds, I'd like to retroactively add a irrigation system to my raised beds.

Raised beds get a rating of 1-2 spoons if they are permanent beds that need no maintenance other than you added more compost/manure once a year.

A 4-5 rating is for those raised beds that may be permanent, but need ongoing maintenance every few years. This would be if you have build the beds with thinner wood that need either wood/varnish paint/protector or even replacing every few years. The 4-5 rating would only apply once in a few years.

Of course, if you are unable to set up raised beds, or don't have that much space, then container growing is the answer.

Pumpkin growing in my front garden out of a large planter, strawberries mixed with perennials
in a medium-sized wood container, dwarf french beans growing in plastic containers.

Containers (Spoonie Veg rating of 1-2, but could be 3 in hot or drier weather)
Containers are a good option if you have limited space as well as limited energy. They can be large planters, as above, which stay in that place, or smaller containers like the plastic ones which fit into smaller spaces and can be moved more easily.

Because I don't have a large garden and have limited options for catching the sun, using containers gives me more growing space than I have with the raised beds alone. For example, the driveway is concrete and gets quite a bit of sun between April and September, so it's ideal for placing containers there, maximising the sun's warmth in this limited space during this period. The car gets parked further down into the shady area.

There were some great suggestions from readers about growing specific veg in containers. Helen finds it much easier to grow potatoes in containers. And I was challenged by Helene for my high spoon score for tomatoes. She grows tumbler cherry tomatoes in a window box, requiring no pruning, pinching or staking, just watering and feeding.

Container growing is also beneficial when it comes to fighting some pests. Matt has found growing baby carrots in containers has been a great way to avoid Carrot Fly. On the other hand, Janet doesn't bother growing carrots in neither raised beds or containers, and instead focuses her limited spoons on veg that increases considerably from one seed. One carrot seed, one carrot. One bean seed, lots and lots of beans. This is a useful way of maximising yields from energy spent.

Containers get a Spoonie Veg rating of 1-2 as it's mainly filling with compost and sowing, watering and occasional feeding, then emptying compost when the annual fruit or veg has finished growing. To save on compost, you could reuse it next year, mixed with some new compost/manure, for a different crop, or put it on your flower beds as a mulch.

I'm experimenting growing garlic in pots. One pot has 1 clove, the second has 2, the third, yep, has 3. I hope to work out the optimum number that develops good sized bulbs in a 10 litre container.

However, containers get a rating of 3 when you have a lot of containers and combined with a dry summer and need to do a lot more watering. In this case, fruit and veg grown in raised beds usually needs less watering as they can send their roots out deeper into the soil to access water and nutrients. Container grown plants cannot do this and you need to water them more often, which increases their Spoonie rating in this instance.

I've tried to capture most of the key issues from a Spoonie Veg perspective for growing in raised beds or containers. Please leave suggestions below if you have other points that you feel should be included.

*If you are new to no-dig, visit Charles Dowding's site where he gives information about the many benefits of no-dig. From a Spoonie Veg perspective, no-dig immediately removes a lot of work from growing.

* * * * *
I welcome your thoughts and comments. And if you blog about gardening with ME/a chronic illness, do link to this post in your blog and leave a comment below with a link to your post, so we can all find each other.

About Spoonie Veg and Gardening with ME

Twitter hashtags: #SpoonieVeg, #GardeningWithME

Recent Gardening with ME posts...
  Gardening with ME: a gentle start to the year with Cornus pruning
  Gardening with ME: a review of 2015

Sunday, 13 April 2014

My entries for "Great British Spud Off 2014"

I love potatoes. Just love them. Growing them, cooking them, eating them. I need a regular potato fix. I don't know if it's some distant Irish genetics in my blood or just that crispy baked potatoes are one of the finest foods on this earth. My Sheffield garden is considerably smaller than my Oxford allotment, so I'm limited in the number of potatoes I can grow. So whilst I'm unable to grow 10 varieties a year and enough spuds to last my partner and I c. 6 months, I can still grow some and get my potato fix.

This year I will be growing Pink Fir Apple and Stemster, in my kitchen garden raised beds, each 1m x .75cms. That was going to be it, until I heard about the Great British Spud Off 2014. In this contest, the idea is to grow one potato in one container. When you harvest your potatoes, you send in the information on how many potatoes you produced and their overall weight. Participants use "whatever soil or compost you wish to grow it in as we hunt for Britain’s spud growing champ". How exciting!

So, as a way of harvesting even more potatoes from my small garden, and the chance of becoming a potato growing champion, here is my entry...

First up: Pink Fir Apple


Pink Fir Apple is meant to be one of those potatoes that does well in containers, so I've got hopes that I should get a good crop. I suggest we not comment on the very phallic look of Pink Fir...

The rules don't say anything about how many entries you can have, so if I'm allowed a second, then here it is...

Second entry: Stemster


This is a good all-rounder potato, and when I've grown it in raised beds in the past I've had a great crop with some very large potatoes. I'm not expecting that much from growing this variety in a container, as I don't think it's really meant to be container grown. However, I had a spare seed potato and decided to throw this into the ring and see how it does.

I have of course covered both with some compost, watered them, and now await my (winning) crop!

Anyone can join the competition, even if you aren't living in the UK! To enter the competition, visit the Two Thirsty Gardeners website for details.

* * * * *

Date planted: 11th April 2014
Soil: compost from Heeley City Farm (green waste compost)
Container: 40cms at base

Tuesday, 12 November 2013

Decision time: the final layout for the back garden

Since moving into our Sheffield home over 7 months ago, I've been observing how the sunlight and shade moves over my back garden, photographing it and thinking about the final layout for the design of the back garden.

How the garden looked when we moved in

The garden is East-facing, which means the left side, next to the garage, is South-facing and gets light all year around. The right side, North-facing, gets no direct sunlight between October and March, and different amounts of sunlight between April and September. The back end (West-facing) gains the afternoon sun to varying degrees all year around, and the conservatory end (house, East-facing) gets morning to mid-afternoon sun (again to varying degrees) all year around. In respect of the shade throughout the garden during any part of the year, this is light shade. This means the taller plants are, the less likely they will be fully shaded unless they are quite close and low down next to the right-side fence. This is an important point, which I'll explain further below when I get to the new vegetable beds.

My aim is to have a small kitchen garden, along with borders for perennials and herbs and a couple of fruit trees, within the above aspect constraints. So my observation and thinking was around how I could achieve this, maximising what I can grow in a small urban garden.

4th April, my leylandii gone but neighbours large leylandii is still there and casting a shadow

The first thing I did was get the leylandii removed from along the back fence removed. Luckily,the large leylandii in the neighbours house behind us was removed a week later and this immediately let more light into the garden. From then on I photographed how the garden looked at different times of day over the following months. By June-July I had got the initial layout decided, the first borders dug out and some plants were getting established, including one vegetable bed.

6th May, all leylandii removed and more light

11:06am, 5th July, with initial beds laid out.
You can see how much sun the garden gets at the height of summer

Now it is November, coming up to 8 months since we moved in. After all these months of observation during different seasons I now have a strong idea of how to make the most of my small urban garden. I realise that permaculture practise advises you to make your observations over a year rather than 7-8 months. However, we viewed the house and garden in November of 2012 and saw it a couple of times during December 2012 and January 2013, so I have a pretty good idea of how much the light will change over the late Autumn, Winter and early Spring periods. I also admit that I'm desperately feeling the need to get the rest of the beds down so I am ready next Spring for the start of the vegetable growing season!

Vegetable border next to the garage, 30cms high, getting direct sun all year around.
Currently containing a mix of garlic and autumn-winter broad beans.

So I have been pondering how to make the most of the small space and its varying sunshine and shade. Of prime importance is having a kitchen garden, everything else comes after that. Deciding how to layout the remaining vegetable beds came first. It is clear that the South & West facing parts of the garden get the most sun for the longest period of time, at ground level. The ground level issue is important, as I discovered if I stood in a 'shady' section when it was sunny in mid-October, it was only shady for the first 30cms. So, if I build up my vegetable beds to be at least 30cms high, the vegetable beds will get sun for a longer period of time, from earlier March and into late October, not just April to September. Those few extra weeks can make a difference when you are growing vegetables!

So I'm going to build the raised beds, using Link-a-bords again, to 45cms high (3 levels). The advantage of building them up to this height is:
a) getting more light (and warmth) onto the beds for a longer period of time;
b) because the soil is acidic, you need a decent depth to add in lots of compost for growing vegetables, which need alkaline soil;
c) it's means less leaning and therefore is better for my back.

I've also (roughly) calculated that because of the way the light moves around the garden, the higher beds shouldn't particularly impact on either the shady border, which gets morning to lunchtime light from the East. And the South-facing beds next to the garage should be further enough away (the path between them will be c. 70-80cms) to not be shaded during the cooler months. Shade in the summer months is not an issue as the sun is so high in the sky.

The Shady Border just starting to develop, c. 6 weeks after planting

Using all this information, I've been using Shoot Gardening's garden planner to help plot out the design to scale. I've been using the planner for a few months now and am finding it quite useful for an amateur gardener/permaculture designer such as myself. It's allowed me to plot out the base map to scale, so including the house/conservatory, garage, driveway & fences, then adding in and playing around with where to size and place beds, compost bins, water butts, pergola etc. You can see more detail on the base map and initial layout in my post from June 2013. For the final layout, I first came up with:


I then plotted this out with stakes and string to get an idea of how how it would 'feel', viz:


Whilst this plan basically works, I was slightly bugged that from the conservatory doors, there would be a direct view from the doors to the back fence, i.e. nothing breaking up the view to give you a sense wanting to explore different areas of the garden. And whilst I don't have much space to really create 'garden rooms' given my criteria, I would like the path you view and walk to wind a little bit(!). However, thinking of natural ley lines, I don't want to create something too windy that would end up being a pain to walk along day-to-day. I will be adding stepping stones as a path in the grass from the conservatory doors to the driveway, and up to the kitchen garden area, which will have plum slate paths. It's the latter that is more important from a natural ley lines perspective, as I don't want too much fuss getting from the house to the compost bins on a regular basis.

So I slightly revised the design and came up with, I think (...) the final layout...


This gives me a slightly skewed view from the house (not a direct line to the back of the garden as one of the veg beds will act as a slight barrier. But it also gives me a fairly direct path from the house up to the compost bins. It has meant I've had to sacrifice a little bit off the herb bed extension, where I wanted to place more sun-loving perennials. I'll just to have to grow more part-shade loving plants - what a shame...!

The grass area, which gets a bit more shade in the summer than the rest of the garden, when you want to sit outside, is next to the house. This makes it easy to access to use, as is the herb border for picking herbs fresh for cooking. I originally thought of putting chairs and tables under the pergola but realised that it would be too hot in summer to sit there, and also, being further from the house we might not end up using it so much. So instead I will put a chair under the pergola, where I also plan on adding a grape vine to grow over it next year. I will obtain some chairs and tables for the grass area, that can be folded away when they aren't needed or for when you want to sit on the grass.

New layout: the herb border extension will come out a bit more,
but I cannot put the stakes in concrete!
Overall, I'm hoping that it will be both functional and attractive.

I believe this layout maximises the use of the areas that get the most sun for the kitchen garden, and gives me plenty to play with in terms of adding perennials, bulbs and other flowers and shrubs. I have already planted a couple of smaller trees, Acer palmatum 'Bloodgood' and Acer palmatum 'Sango-kaku' in the shady border. The only 'larger' trees I'm adding to the garden are fruit trees, specifically Greengage 'Denniston's Superb', Damson Shropshire Prune and Morello Cherry. I'm also placing Quince Leskovacz in the front garden.

Veg beds against the large South-facing garage wall.

I haven't forgotten that there is all that vertical South-facing space that is the garage wall! The reason for spacing the veg beds out out rather than making one long bed, is that I plan on needing access to the garage wall; I'm going to turn it into a kind of greenhouse space. I'm still working through the exact details (shelving, supports, glass or clear plastic for greenhouse warmth etc), but I knew I wanted to make the most of this warm space, hence planned the paths and access from the start.

Finally, before anyone says "what about all that space at the the back fence", well unfortunately, it's not that simple. When we got the leylandii removed upon moving in, we found we had not one but two back fences, and a massive immovable block of concrete wedged in between them. We eventually found out that a stupid contractor used by the previous owners of the house had a large amount of concrete in it's liquid form left over from when he had finished the driveway. And guess what he did with it. Argh!

Two fences and a large block of concrete. Insert swear words...

The neighbours living behind our house obviously decided to put up a new fence, the old fence being steel railings which mean everyone could see into each others garden and conservatory. The concrete block was actually on their side of the fence and they decided not to bother with it and just build the new fence in front of it. Well, that's one solution, but it means that I now have about 30cms of their land on my side of their fence.

Back fence with temporary planting, to be replaced by a pergola with grapevine

I took advice from the council and spoke to the neighbour, and what I need to do is not put anything permanent on their land. The neighbour isn't particularly worried about it, but you never know who may buy the house in the future and I don't want a 30cm boundary dispute in the future! So I'm building my pergola within the border where the steel railing fence was, and sowing wildflowers and adding some perennials into the 'neighbours land'. These plants can be easily removed if need be in the future. Once the pergola is up, that should both define the boundaries clearly, and once the grapevine gets growing, it should hopefully mean that it creates a screen between our garden and the neighbours, so we both have more privacy and aren't constantly looking into each others garden and conservatories.

View of the proposed new layout looking back towards the conservatory

So, decision made, that's the plan! Now, the work... After some angst I finally have found a landscape man to do the, well, landscaping. All the grass is coming up, grit etc will be added for aeration, before putting down the membrane then slate paths in the kitchen garden, and new turf for the grass area. He is also going to add in railway sleepers both as a small retaining wall and to create a step or two up to the pergola and compost areas, and he is going to build the simple pergola to my specifications. Subject to the weather holding, work starts in December.

I'm very excited.

* * * * *
This blog is probably rather heavy on detail regarding the light and shade issue and how to place things, and I'm not sure it will be of interest to many people. Writing it has been really useful to me as I can recheck all my thinking and see how I came to the decisions I've made. If it is useful for other people, or you see something I've missed that you can tell me about, even better!

Thursday, 11 July 2013

Problem: growing vegetables on acid soil. Solution: raised beds

Along with recently setting up my first perennial beds, I have now also got my first vegetable raised bed growing.

first vegetable bed

I did a soil test early on, and found out two key things. One: the soil is incredibly heavy clay. The kind of clay I'm guessing Whichford Pottery might be able to use for their pots! Incredibly heavy, red-like clay (perhaps iron in it?) that is hard to stick a stake into, let along for a poor plant to try and get it's roots into.

Two: the soil is quite acidic in parts (some parts less than others). This is largely fine for most hardy perennials, most of which can tolerate a broader set of soil conditions (I did add a lot of compost to the perennial beds though, for nutrients and to improve the growing conditions). But acid soil is not much good for most vegetables as they need alkaline soil in which to grow.

This information led me to decide to dig up the grass and top soil*, about a couple of inches, and to build on this with deeper raised beds than I have previously (30cms tall rather than 15cms). By creating deeper beds, it would extend what I can grow within them, including more deep rooting vegetables like carrots, parsnips and potatoes, as well as more shallow rooting vegetables like lettuce and spinach**.

*You would normally keep your top soil, but as mine was just acidic heavy clay, compacted and weedy, it would have been almost useless to use for growing vegetables. Plus, a lot of work trying to separate weed from clay - just not worth the time/effort.

**Though spinach can send down some deep roots, I have discovered in the past when pulling out the old bolted crop at my previous lottie. 60cms or longer roots - impressive.

30cms deep raised bed, using a double row of link-a-bords.

This first bed now contains a mix of vegetable seedlings, including carrots, pak choi and winter cabbage, along with tomato and climbing French bean plants, basil & coriander. I chose a shorter variety of carrot, D'Eysines from Real Seeds rather than a longer variety that might end up growing into the acid soil.

D'Eysines Carrot seedlings. Sticks to protect young seedlings
from cats digging!

I had a bunch of coriander seedlings I had grown in pots and decided to plant them out around the edge of the bed, particularly next to the carrots. I just thought this might help deter carrot fly. I've not read this anywhere, rather I just had a theory that coriander has a strong fragrance and that it might be worth trying as a deterrent for carrot fly. Let's see what happens.

Pak Choi 'Canton Dwarf' seedlings

I got the Pak Choi seeds from my Seedy Penpal this year, Linda. It's the right time of year to sow Pak Choi, after midsummer, so glad I got to make use of the free seeds. Looking forward to stir fry...

I have two more double raised beds to build over the coming few weeks. I want to get some more seeds sown, like kale, spinach and chard, so I have something to harvest in Winter and early Spring.


I'm having to do this all a bit more slowly than I would like due to health issues (I have ME), but that's ok. I've finally got my first vegetables growing, despite moving into a new garden with acid soil only 3.5 months ago, and I'm pretty pleased with that.

If you are interested in growing using raised beds, do read VP's latest blog: I heart raised beds. It gives a very good overview for other reasons (besides acid soil) that growing vegetables on raised beds is definitely worth a try.