Showing posts with label Vegetables. Show all posts

Thursday, 28 May 2020

Keeping blackfly off Broad Beans

Broad beans in the kitchen garden. You can see the first beans are almost ready to pick.

It's the time of year to start planning those broad bean meals, as the first crops should be ready to harvest soon. However, just before the broad beans are ready for eating, also happens to be the exact same time that the dreaded Blackfly (black bean aphid - Aphis fabae) decide to make an appearance. They suck out all the goodness from the plant and can destroy much of your crop if you don't get them under control.


Images: Left - The Vegetable and Herb Expert (2002), Right - RHS website.

The blackfly head for the tips of the broad beans first, as per the picture on the left, and an example of a bad infestation is on the right. It can take only a couple of days to go from just appearing, to a bad infestation, which can destroy the flowers before they even turn into beans.


If you notice that you have ants going up and down your beans, that's because they are also getting read for them. Ants 'farm' them (photo above) and can make an infestation so much worse. These are my tips for getting ahead of the blackfly.

Pinching out the tips
The first tip, is to pinch out the tips of the broad beans. This is because this is where the blackfly will land and start their infestation. By taking out the tips, you are opening up the top of the plant to more light and air, making it a little harder for them to take over.

You want to do this once the plants look like they are a decent size and have plenty of flowers on them. This is usually around early-mid May, but can depend on when you sowed them. Earlier May if you sowed in Autumn, later May if the sowing was done in Spring.

The circle shows the tips in detail.
You can see lots of young leaves and flowers all wrapped up tight.

From another angle, me holding the tip I'll pinch out.


Closer in, you can see I'm going to take out the whole tip.

Use your fingers (or pruners if you like) and snap off the tip.

Remember, the tips are edible and you can add them to salad or a stir fry.

The flowers have been pollinated and the bean pods are developing.

Spray the blackfly
Even with pinching out the tips, the blackfly will most likely still attack the beans, you've just slowed down the process. The second line of defence is soapy water, which works by clogging up the pores which insects breathe through, effectively suffocating them. Technically, it can harm all insects, including the good ones. But it dissipates quickly and doesn't really harm anything which isn't directly sprayed.

Squeeze some washing up liquid into a sprayer (see pic below) then fill to about 3 quarters. Given it a really good shake so it gets all soapy. Then squirt the soapy water directly onto the blackfly. Be really generous and drown the buggers. Also make sure to spray the undersides of the leaves as they can hid there too.
A squirty bottle with soapy water, filled to three quarters.

Make a concerted effort of spraying them morning and evening for a few days, and most will eventually be killed off. A few may hang around, but they will be weakened, and you will have saved most of your crop.

The soapy water won't hurt good bugs like ladybirds (whose larvae eat blackfly), just the bad bugs like blackfly. In fact, you can also use this solution on greenfly.

 Dwarf broad beans, in front of tall ones

Other options
Other options include ordering some ladybird larvae to be delivered to you, as these dine on blackfly quite voraciously, and they could solve your problem. I have yet to try this, so cannot say how well it works.

Some people use Neem oil for a really bad infestation. It's apparently effective, but can be hard on the plant and it can kill 'good' insects, so best kept for when you need the nuclear option.

Both Neem oil and Aspirin contain high levels of salicylates, the plant hormones involved in boosting pathogen-defending protein production in plants. Salicylic acid is also used by some plants as a signalling mechanism when they're under attack. Predatory insects and insect eating birds will follow a trail of salicylic acid, expecting a swarm of aphids or similar. So adding 1 soluble Aspirin to your soapy water is worth trying, and one I will experiment with this year.

An 'untidy' garden, particularly for ladybirds to over winter in, to increase their habitat and numbers, can help. Whilst I do this every year, and I've created a bug hotel, I've still not had much luck with increasing the number of ladybirds in the garden, so I continue to resort to pinching out tips and soapy water.

* * * * *
If you can, try to check your beans daily for blackfly. The sooner you notice and start spraying them, the better chance you have of keeping them under control.

A few days of some dedicated checking and spraying, and you can look forward to eating these!
 Just picked (last year) broad beans


P.S. Thanks to people on Mastodon (you know who you are) for sharing their experience of using Neem oil and Aspirin. To Alx who said their beans are looking much better after just a few days of the washing up liquid spray suggestion, and Xan for the extra information about how the soapy water works on the blackfly.
 
I also recommend reading a short post by a gardening professional, Saralimback, about the negative impacts of neem oil on your ecosystem.


Wednesday, 6 May 2020

My top tip for keeping cats, foxes and birds off your newly sown beds

Frequently I see people comment on social media about the difficulty of keeping cats, foxes and other creatures, off their newly sown beds. I thought I'd share my tip, which pretty much always works.

Right: Parsnip seed


These are newly sown rows of parsnip and beetroot.


Basically, you need some netting and something to hold the netting down. Ideally, go for finer netting, as this will also keep the birds off the seedlings. And sparrows, in particular, love the fresh germinated leaves of vegetables like beetroot, spinach, chard and lettuce.

Right: netting over young beetroot seedlings. The netting is
held down tightly so birds cannot get under it and get trapped.

When I prepare the netting, I make sure I allow not just enough to cover the space, but also enough space for the young seedlings to grow without squishing up, and then growing through, the netting. Otherwise, when you come to take the netting off, you'll pull out the seedlings. I fold under the extra netting and pin that down, then unfold it once I need to give the seedlings more room. In the picture above, you can see the netting on the bottom part of the picture has been folded over then pinned down.

Below is some netting over some salad seedlings. The glass cloche on the left is because I wanted that cultivar to grow quicker so I would a) have some new lettuce sooner, and b) by trying to get it grow quicker, I'm hoping I'll have time to harvest but also let it go to seed so I can save the seeds before the autumn frosts hit.

The lettuce seedlings (below) are now getting bigger and were just about to start growing through the netting. So I've unfolded the extra netting and have lifted it to give them more space to grow. At this point, they are still a bit young for removing the netting entirely. I've done it too soon in the past and come out the next day to see the seedlings dug up.

The seedlings are now well established and have taken over most of the space, so it's now safe to take the netting off. You can also see how the cloche made a difference, with the lettuce on the right being bigger than that on the left.

The parsnips and beetroot are slower growers, and still too young to take the netting off. It will probably be another month before they'll be established enough.

When it comes to what materials to use, as you can see, I have used plastic netting. I've had this same netting for years and it just last and lasts. Netting is also easy to water and rain through. Because these beds are permanent, I'm cutting the netting to suit each bed, and when I take it off, I'll pin a note to the netting before putting it away, noting which bed it fits for when I need to use it next time. Yes, I'm organised  :)

To hold it down, I use steel ground pegs (see right). Again, these last forever. You could obviously use other similar tools. Some people use old soft drink bottles as individual cloches that protect and encourage germination and growth. I've tried this but found I had to lift them to water the seedlings, and that was just annoying.

I have tried tricks like using hot chilli powder spread around young plants, putting in lots of sticks to keep cats off etc. These can work a bit, but you have to reapply the chilli every couple of days and after rain, and a determined cat can work around sticks. I know, my cat is quite determined!

In the end, I've found the netting and ground pegs keep all creatures off, as well as safe from being trapped under the netting, and my seedlings are protected until they have grown up enough to go net-free.

Looking from the kitchen garden back towards the house

Saturday, 18 January 2020

Gardening with ME: plans for the kitchen garden this coming season


I've been mulling over what to grow in my veg beds this coming season. I decided to focus on the following categories:

A) veg I love but cannot easily get hold of from our local supermarket,
B) veg I love but makes good sense to grow yourself, and
C) some veg I love and just want to grow my own.

This might seem like I'm not leaving much out, but I'm pretty much excluding most of the large Brassica family, as I find them just too much work. In particular, dealing with the depredations of the cabbage white moth, even when using protection such as agricultural mesh. I'm not bothering with Carrots as carrot fly can be quite a pest, again, even when using protection. Anything (except pumpkin/squash, see C below) that requires lots of heat, which you can never guarantee in and English summer, is being left out. So no aubergines, cucumbers or sweetcorn.

In category A fit veggies such as Kohl Rabi, Fennel bulbs, Peas, Tatsoi and Broad Beans. Whilst peas are common, fresh peas are not, and the same with Broad Beans. I adore Broad Beans, and sowed some this Autumn past, and because of the mild winter, they have already taken off.

Some Broad Beans picked last year

Kohl Rabi, is part of the Brassica family, but from previous experience I've learned that it didn't seem to be bothered by pests, in particularly, the cabbage white moth. I'm growing it because it tastes good (roasted in particular), and I mean, how can you not grow it. It's purple. It looks like an alien. It's purple!

Mmmmm, purple Kohl Rabi

Roasted Fennel bulbs are divine. They have a licorice flavour, and even my partner, who doesn't like licorice at all, adores roasted fennel bulbs. I'm going to try Tatsoi because I do love making stir fry and the only place I can buy it requires a car journey.

The main veg in category B is lettuce. Not only do I find a lot of lettuce from the supermarkets bland, more importantly, it's easy to grow, and mine won't be covered in plastic. Lettuce is also one of those veg where one packet of seeds can supply us in salads for months. I'll be growing a mix of salads, including 'Bronze Arrow', a excellent cultivar from the Heritage Seed Library. I'm going to try and grow enough to save some seeds from these.

I also find Climbing and Dwarf French beans easy to grow and fresh beans are so good. The bonus is, if I end up not picking them, I can let them go to seed and then use those in stews in winter.

A pumpkin grown a few years ago

Finally, the those I just love, category C, which include my beloved garlic, but also courgettes and pumpkin/winter squash. Yes, pumpkins need a good period of heat and decent autumn. So this year, I stopped myself from ordering some Queensland Blue seeds (a massive pumpkin), and instead I'm just going to try a couple of the smaller cultivars such as Blue Kuri.
 
Of course, there is a proviso on any plans, my health. You cannot plan for the daily, sometimes even hourly, fluctuations and impact of ME. But I can plan for best case scenario, with the understanding that all might fall apart if the ME symptoms get worse. And to be kind to myself about this, if this is the case.

I've purchased the seeds I didn't have, some from Real Seeds and Seed Co-op, plus this years Heritage Seed Library seed choices have arrived. Now it's just waiting for it to warm up enough to be worth making the first sowings.


Friday, 30 August 2019

Garlic giveaway 2019

Update Thursday 5th September 2019
This offer has now been oversubscribed, so I can not take any more requests

Garlic drying in the sun

 My garlic did really well this season. I've sorted through it, what I'm keeping to sow in Autumn, and what I'm saving to eat through the coming year. And I have enough to also do a bit of a garlic giveaway!

I've included some basic info below, but if you'd like to know more about the individual varieties, do take a look at my Garlic Record. If you would like to know more about growing garlic in general, please read my Spoonie Veg: garlic post first.

As there is only 2 packs (each pack contains 5 cloves) available for each variety, you can choose up to 2 varieties you'd like to try. Or I can choose for you if you're not bothered. Then email me your address details to: jgp @ cooptel.net. I plan to send these out in batches, during September. Note: if I get inundated with requests(!), then I might reduce it to 1 variety per person, so more people have a chance to try them.
Due to postal restrictions, this giveaway is only available to people in the EU/UK. This offer is available until 22nd September 2019, and is on a first-come, first-served basis. And yes, this is a free offer :)

Garlic ready for harvesting, at the end of July

Varieties available
Unless otherwise denoted, the variety has a medium flavour, and will grow ok in pots.

Georgia Fire: storage 4 months.

Martin's Heirloom: storage 5 months.

Metechi: medium-strong flavour, storage 5-6 months, not happy being container grown.

Music: storage c. 5 months.

Persian Star: storage 4-5 months.

Rosewood: storage 5-6 months

Silver Rose: 6 months, not happy being container grown.

NOW GONE Susan Delafield: storage 6-8 months, this is the best variety if you want to grow in containers.

Apart from Silver Rose, which is a Softneck garlic, all other varieties are Hardnecks (see below). All can be sown in Autumn (October/November).


General information
Hardneck garlic: Allium sativum var. ophioscorodon: always produces a flower stalk (called a scape, see photo at the bottom of the post), is considered to have a stronger flavour, and is considered to have shorter storage qualities.

Softneck garlic: Allium sativum: doesn't produce a flower stalk unless stressed, has better storage qualities.

Soil: alkaline to neutral soil. Do not grow in acid soil. Most don’t do as well in heavy clay, garlic needs decent drainage.

Storage: the length of storage time is based on the conditions I have stored the garlic (more about this in the Spoonie Veg: garlic post).

Container growing: you can grow garlic in containers. I found 3 cloves per 10 litre pot gave me the best harvest. See my Container grown Garlic experiment post for more information.

Posts about growing garlic:
Spoonie Veg: garlic (for an overview of growing garlic)
Container grown garlic experiment (optimal conditions for growing in containers)
Garlic scapes (for Hardneck garlic varieties)
Getting the garlic in (sowing garlic in Autumn)
Garlic Record: my record of growing these garlic varieties since 2010. It gives more detail on the growing of each variety
Garlic growing back in June, with a garlic scape, which is edible too.


Wednesday, 17 July 2019

New veg beds - aka finally making a decision on the final layout of my kitchen garden

The kitchen garden?

Not an inspiring photograph, is it? I mean, yes, you can see my slowly developing Forest Garden Border around the edges (the blueberries are nearly ready!), and some raised beds with garlic. But the lawn dominates. However, not for much longer.

I've always intended that this area of the garden would become my kitchen garden, as it gets the most sun all year around. I just hadn't been able to make a decision about the design layout. I've played around with a number of layouts over the last few months, and I've finally came to one that I both liked, and that I felt maximised the use of the space. And here's the plan:

Base map: showing the shape of the design clearly

I view it as a geometrically-shaped flower.

The design has been very carefully measured a few times, and I'm certain that it will work. And I must thank Andrea, my gardener, who helped me with the final measuring out and design tweeks.

 Final design with all the careful measurements

Once again, I'm going with straight lines. That's because straight lines are so much cheaper to build. I plan on adding some plants, such as creeping Thyme, along the paths, as well as some other low growing herbs and ornamental plants, which over time will help break up the lines.

The beds will be made sleepers again and will also be two levels high. As I've mentioned before, I have acid soil, so I need to build the soil level up with alkaline/neutral compost if I want to grow vegetables. For the paths, we will be putting down a permeable membrane, and will then add purple shale on top. I've used this method in the past and I know it works well and looks good. 

The obelisk sitting in the middle of another raised bed during last winter.

I'll be moving my Obelisk from it's temporary position (above) to the centre kitchen garden bed, which will add some height and year round interest. And of course, it will be good for growing climbing french beans and peas, with cut flowers, including sweet peas, on alternate years.

The landscapers will be here next week! And I've just ordered the nearly 5 tonnes of compost to fill the beds. So it's all go for my new kitchen garden borders.

Thursday, 6 June 2019

Garlic scapes

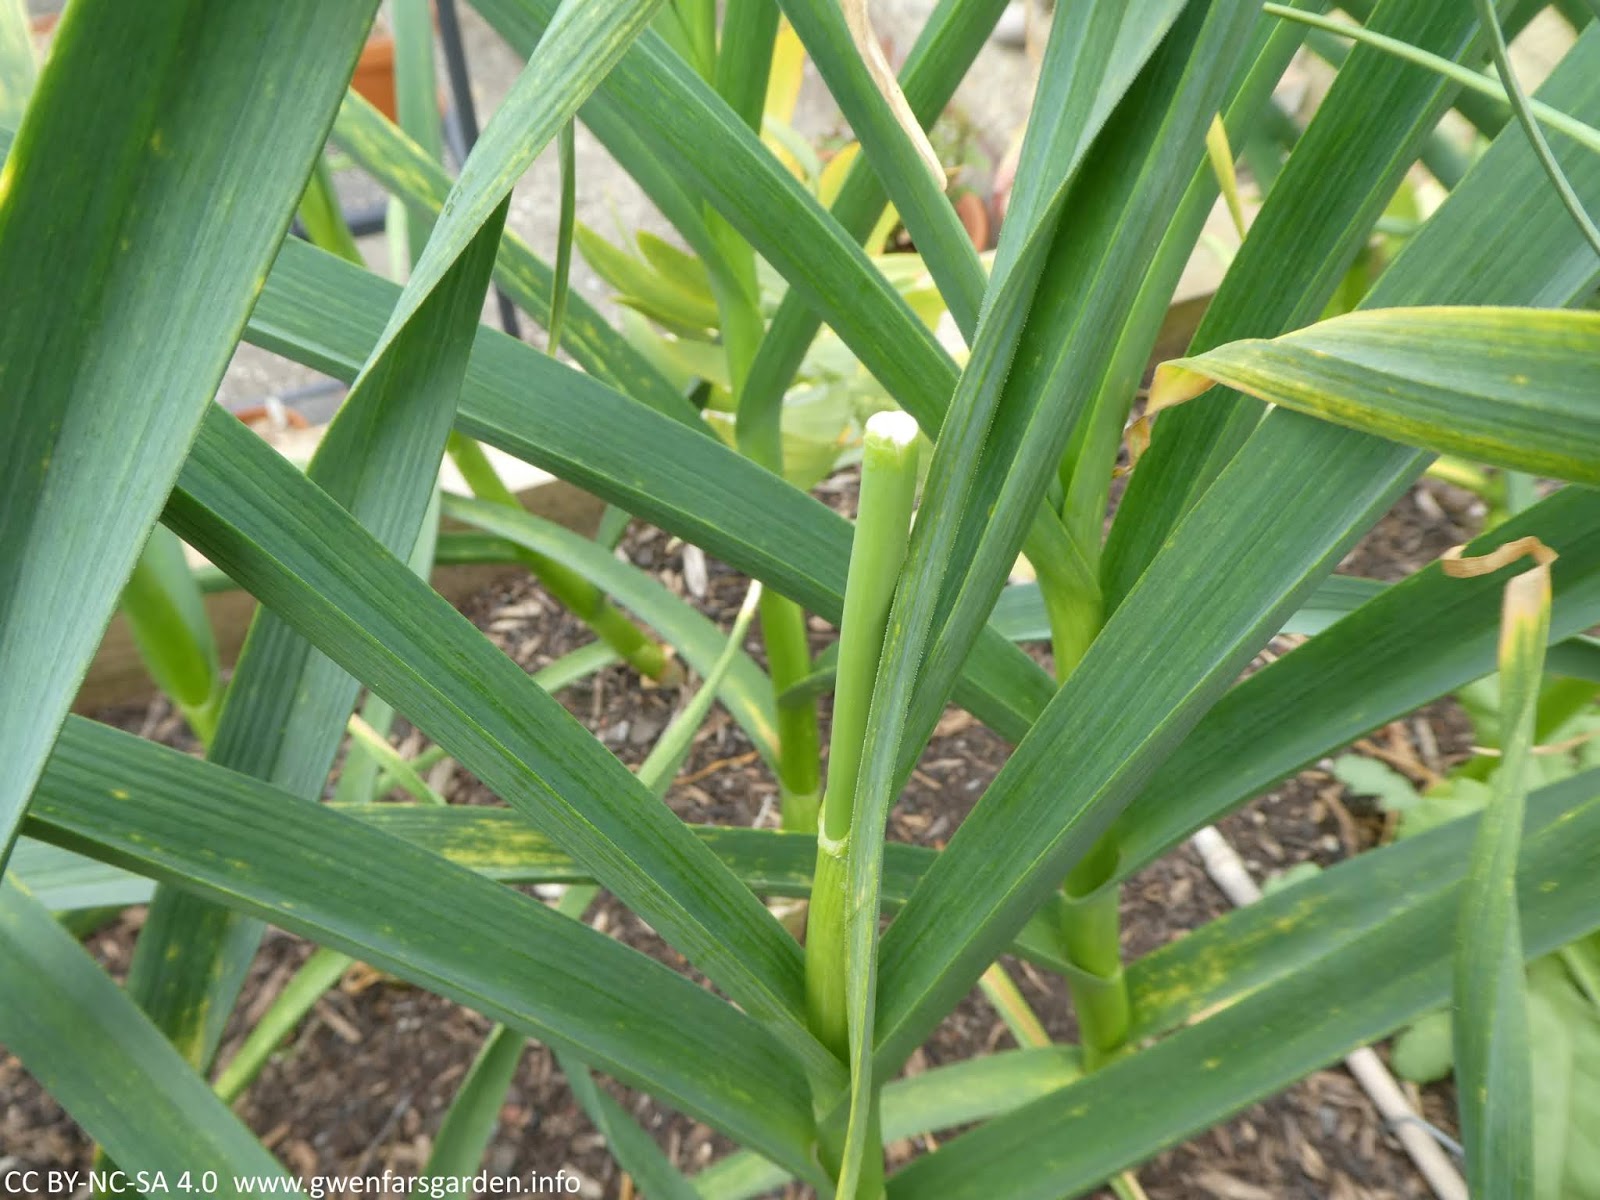
Garlic scapes grow on Hardneck Garlic, and occasionally on Softneck Garlic (usually if stressed). If you aren't sure what type of garlic you are growing, you'll know if it starts producing a scape, which develops around late May and early June in the UK.

You need to remove the scape as otherwise the garlic plant will put all it's effort into creating 'bulbils' (miniscule bulbs) in the scape, as the expense of the bulb in the ground.

1. A garlic scape just developing.

2. The scape has further developed and is leaning over.

3. The scape has now turned into a hook.

You want to snap off the garlic scape as soon as you notice it. This is because the plant will put all it's energy into developing the scape, at the expense of the bulbs in the ground. The scapes turn into flowers that produce 'bulbils', tiny bulbs, which are interesting per se, but not if you want to actually harvest some garlic bulbs!

4. Snap the scape off at this point.

5. The scape section left of the plant may still grow a little more, but will then stop, viz:

6. Don't waste the garlic scapes, as they can be eaten!

A lot of people make Garlic Scape Pesto (think normal pesto but with garlic scapes included). However, I tend to just chop it up and add it into whatever I'm cooking at the time, such as omelettes or a curry. You can add it into any dish you might add garlic to. The Garlic Farm have a good list of suggestions if you want further inspiration. The scapes have a milder flavour compared to the bulbs.

So, if you notice these developing on your garlic, now you'll know what to do with them.

Updated: 1st June 2020

* * * * *
If you would like to know more about growing garlic, do check out my Spoonie Veg: Garlic post.


Monday, 5 October 2015

Gardening with ME: facing some hard facts

Helianthus 'Velvet Queen'

It's never easy when something is staring you in the face that you are doing your best to ignore. It doesn't matter where you turn, it's there telling you it's time to face some hard facts. The fact is my ME is getting worse, not better. The fact is if I want to recover, I need to give more things up so I can rest a lot more. The fact is, I simply cannot garden with ME as I have been in the last year.

Of course, it's not just gardening of which I've still been doing too much. It's other things too, such as trying to study, long-distance, for my bookkeeping certificate, helping my partner set up our new company, Zukini, as a platform to launch his video-editing Mac software, the day-to-day life stuff (from having a shower to paying bills and doing housework) and of not pacing out more carefully time spent with friends. It's very hard when you are enjoying the company of friends to stop and say "I have to go and lie down for an hour".

Climbing French Beans waiting to be picked (I'd already picked c. 2 kg prior to this)

Stopping gardening altogether is not an option. No gardening, what's the point of life?! So I've been doing a lot of thinking about how to continue gardening, but on at a further reduced level. I've come up with the following plan:

Paying someone to help me with the gardening: this I've already started, with a lovely guy, Chris, who isn't a gardener per se, but is interested and willing. It's only short term as he is looking for a full-time job (he is a chemist PhD), so I'm trying to make the most of him whilst I can. He has got lots done, from weeding and mowing to adding well-rotted manure and compost to the beds and planters in readiness for spring bulbs and garlic. The latter is so I don't have to do any preparation at all, just push the bulbs and cloves in to the soil, which is the easy part.

Helenium 'Lemon Queen'

Rethinking what needs doing: following on from making the most of Chris, I've made a very long list of tasks that need doing and am carefully prioritising these. Anything heavy or requiring physical strength is on top of the list, such as moving manure around, putting up more wire for my Morello Cherry espalier. This also means that I got him to pick all the climbing french beans, then take down all the canes etc at the start of October, even though they were still producing. The beans came out early so that the beds can be prepared for planting of spring bulbs.

Courgettes are fairly easy to grow with little maintenance besides watering and an occasional feed.
A good Spoonie Veg.

Cutting back on what vegetables I plan to grow next year: I'm working on a list of Spoonie Veg*, that is, vegetables that don't need too much attention and are easy to grow and maintain for people with chronic health conditions like ME. I hope to blog about this in more detail over winter. To give you a quick flavour:

In: garlic, dwarf broad beans, dwarf french beans, peas, spinach/chard, beetroot, parsnips, carrots, courgettes and pumpkins. Except for garlic, I'll be growing less of each next year, compared to what I grew this year.

Out: tomatoes, most brassicas (except kohl rabi and maybe kale), climbing french beans (the extra work putting up the canes), potatoes, aubergines and sweetcorn.

I'm reducing how many beds will be for vegetable production, and I will be throwing in some annual wildflowers and a few perennials for interest, but requiring little work, in that space.

Spoonie Veg example (below): Brassicas in cages to left in the dark (the angle of the sun, not normally in the dark), and to the right. Brassicas can be quite a bit of work, from setting up cages to protect them from pests, to ongoing maintenance over a long period of time. Not a good Spoonie Veg. In the middle bed there are some young Kohl Rabi plants. These seem to survive pests much easier and are low maintenance, so a good Spoonie Veg.


Accepting that the perennial borders might not always get well looked after: one of the reasons I stopped doing End of Month View a couple of months ago, is that my Long Shady Border was getting literally no attention from me and it was looking pretty messy and un-weeded. I just had no time to maintain it, as what little energy I had was focused on the vegetables. In some ways, this is where growing hardy perennials comes into their own, as they can manage for a time without too much attention. Most of the plants were in good health, some starting to take over(!), but the border was looking scraggly, the weeds getting bigger and and any thoughts about editing some sections were out of the question. Although I'm cutting down on the veg growing next year, I need to accept that I cannot go and use that 'spare' energy on the perennials. No, I have to do less, a lot less, and the point is to cut back. The perennial borders may continue to be scraggly. So be it.

Right: Actaea simplex (Atropurpurea Group) 'Brunette' in the Long Shady Border

Severe reduction in plant buying: this is going to be really hard, but I'm setting a rule that I cannot buy any new plants until any previously purchased plants have been planted out. In fact, I really need to stop plant buying and focus my limited energy (spoons!) on the maintenance of what I already have. Easier said than done though. It's so hard to stop buying more plants. There is so much pretty out there.

Future garden help: in the long term, I'd like to find an experienced gardener that can help out say once a month, but I will worry about that next year.


After the Climbing French Beans have been removed (thanks Chris)

Overall, my aim it to try to continue to garden with ME but on a much smaller scale. I have to accept there will be weeks where little, if anything, gets done. I'm trying hard psychologically to be ok with this, which isn't easy, as I'm sure you can imagine. But I need to face the hard facts as they are. If I want to be able to continue to garden in the future, I need to look after my health now.


* * * * *
*Spoonie comes from Spoon Theory, by Christine Miserandino. Her website But you don't look sick explains it fully. For a simple introduction, I recommend Suzy Coulson's How will I use my spoons today poster (right). I have c. 15 spoons a day and might use some of them thus:
  x1 spoon getting up
  x3 spoons shower
  x2 spoons x 3 for breakfast, lunch & dinner
That's 10 spoons already.


I welcome your thoughts and comments. And if you blog about gardening with ME/a chronic illness, do link to this post in your blog and leave a comment below with a link to your post, so we can all find each other.

About Gardening with ME

Twitter hashtag: #GardeningWithME

Recent Gardening with ME posts...
  Gardening with ME: then and now
  Gardening with ME: gardening, blogging & ME

Wednesday, 7 January 2015

Seed viability: 2015 update

Update 5th January 2019: please see the 2019 update to this post


When I undertake my annual sorting through my seeds to see whether they are still viable (in date), I cross-check it against the Seed Viability spreadsheet that I originally created in 2012. In doing so the other day, I thought I'd check whether there have been any changes to when people consider seeds to remain viable.

Those from Amateur Gardening magazine, haven't changed since 2012. The Seed Savers' Handbook by Michel and Jude Fanton hasn't been updated, so their 1993 edition still stands. There are some differences in the viability periods in the John Harrison listings. The 2012 dates were based on L D Hills, whereas his 2014 listing was updated in light of comments from a few expert growers.

There are other websites (predominantly in the US) now listing information on seed viability (not so much in 2012), however I'm sticking with these as they are comparable, which is the best I think you can hope for in this area of horticulture where if, as John Harrison says "...there are 3 growers assembled you will get 4 opinions!" For me, those listed below give enough indication of what to expect. Furthermore, I got the vegetable list from the Seed Savers Handbook from the Heritage Seed Library in 2012 and I figure they know what they are talking about.


It's important to note that even with the viability ranges listed, seeds can often either fall short of expected viability, or be viable for a much longer period. Much can depend on how they are stored. John Harrison offered some useful advice:
As you probably know, viability is very subject to storage conditions. Consistent, cool and dry being the best. Don't fall for the 'frozen keep forever' - the seed banks like the huge one in Norway prepare the seeds very carefully before they go to the minus 20 store deep underground - ready to replenish the earth after the asteroid hits or whatever. Just freezing will kill off most seeds as the water in them forms ice crystals that rupture the cell membranes.
Incidentally I've sown courgette seeds 7 years past the date on the unopened packet and got 100% germination! Obviously the old car's glovebox was the perfect place...
So view the figures above as a guideline. And if you have the time and energy, don't be afraid to experiment with 'out of date' seeds.

If you would like to know about seed germination, John Harrison's website has some useful information on how to test for this.


Sources
Amateur Gardening, 20th December 2014 http://www.amateurgardening.com/top-tips/ornamental/seed-viability/

The Seed Savers' Handbook, Michel and Jude Fanton, 1993 http://seedsavers.net/shop/home/tools-resources/the-seed-savers-handbook/ Photocopy sheet from Appendix A

John Harrison, 5th January 2015 http://www.allotment-garden.org/seed-saving/seed-storage-life.php & email correspondence 8th January 2015.