Showing posts with label Kitchen garden. Show all posts

Thursday, 28 May 2020

Keeping blackfly off Broad Beans

Broad beans in the kitchen garden. You can see the first beans are almost ready to pick.

It's the time of year to start planning those broad bean meals, as the first crops should be ready to harvest soon. However, just before the broad beans are ready for eating, also happens to be the exact same time that the dreaded Blackfly (black bean aphid - Aphis fabae) decide to make an appearance. They suck out all the goodness from the plant and can destroy much of your crop if you don't get them under control.


Images: Left - The Vegetable and Herb Expert (2002), Right - RHS website.

The blackfly head for the tips of the broad beans first, as per the picture on the left, and an example of a bad infestation is on the right. It can take only a couple of days to go from just appearing, to a bad infestation, which can destroy the flowers before they even turn into beans.


If you notice that you have ants going up and down your beans, that's because they are also getting read for them. Ants 'farm' them (photo above) and can make an infestation so much worse. These are my tips for getting ahead of the blackfly.

Pinching out the tips
The first tip, is to pinch out the tips of the broad beans. This is because this is where the blackfly will land and start their infestation. By taking out the tips, you are opening up the top of the plant to more light and air, making it a little harder for them to take over.

You want to do this once the plants look like they are a decent size and have plenty of flowers on them. This is usually around early-mid May, but can depend on when you sowed them. Earlier May if you sowed in Autumn, later May if the sowing was done in Spring.

The circle shows the tips in detail.
You can see lots of young leaves and flowers all wrapped up tight.

From another angle, me holding the tip I'll pinch out.


Closer in, you can see I'm going to take out the whole tip.

Use your fingers (or pruners if you like) and snap off the tip.

Remember, the tips are edible and you can add them to salad or a stir fry.

The flowers have been pollinated and the bean pods are developing.

Spray the blackfly
Even with pinching out the tips, the blackfly will most likely still attack the beans, you've just slowed down the process. The second line of defence is soapy water, which works by clogging up the pores which insects breathe through, effectively suffocating them. Technically, it can harm all insects, including the good ones. But it dissipates quickly and doesn't really harm anything which isn't directly sprayed.

Squeeze some washing up liquid into a sprayer (see pic below) then fill to about 3 quarters. Given it a really good shake so it gets all soapy. Then squirt the soapy water directly onto the blackfly. Be really generous and drown the buggers. Also make sure to spray the undersides of the leaves as they can hid there too.
A squirty bottle with soapy water, filled to three quarters.

Make a concerted effort of spraying them morning and evening for a few days, and most will eventually be killed off. A few may hang around, but they will be weakened, and you will have saved most of your crop.

The soapy water won't hurt good bugs like ladybirds (whose larvae eat blackfly), just the bad bugs like blackfly. In fact, you can also use this solution on greenfly.

 Dwarf broad beans, in front of tall ones

Other options
Other options include ordering some ladybird larvae to be delivered to you, as these dine on blackfly quite voraciously, and they could solve your problem. I have yet to try this, so cannot say how well it works.

Some people use Neem oil for a really bad infestation. It's apparently effective, but can be hard on the plant and it can kill 'good' insects, so best kept for when you need the nuclear option.

Both Neem oil and Aspirin contain high levels of salicylates, the plant hormones involved in boosting pathogen-defending protein production in plants. Salicylic acid is also used by some plants as a signalling mechanism when they're under attack. Predatory insects and insect eating birds will follow a trail of salicylic acid, expecting a swarm of aphids or similar. So adding 1 soluble Aspirin to your soapy water is worth trying, and one I will experiment with this year.

An 'untidy' garden, particularly for ladybirds to over winter in, to increase their habitat and numbers, can help. Whilst I do this every year, and I've created a bug hotel, I've still not had much luck with increasing the number of ladybirds in the garden, so I continue to resort to pinching out tips and soapy water.

* * * * *
If you can, try to check your beans daily for blackfly. The sooner you notice and start spraying them, the better chance you have of keeping them under control.

A few days of some dedicated checking and spraying, and you can look forward to eating these!
 Just picked (last year) broad beans


P.S. Thanks to people on Mastodon (you know who you are) for sharing their experience of using Neem oil and Aspirin. To Alx who said their beans are looking much better after just a few days of the washing up liquid spray suggestion, and Xan for the extra information about how the soapy water works on the blackfly.
 
I also recommend reading a short post by a gardening professional, Saralimback, about the negative impacts of neem oil on your ecosystem.


Wednesday, 6 May 2020

My top tip for keeping cats, foxes and birds off your newly sown beds

Frequently I see people comment on social media about the difficulty of keeping cats, foxes and other creatures, off their newly sown beds. I thought I'd share my tip, which pretty much always works.

Right: Parsnip seed


These are newly sown rows of parsnip and beetroot.


Basically, you need some netting and something to hold the netting down. Ideally, go for finer netting, as this will also keep the birds off the seedlings. And sparrows, in particular, love the fresh germinated leaves of vegetables like beetroot, spinach, chard and lettuce.

Right: netting over young beetroot seedlings. The netting is
held down tightly so birds cannot get under it and get trapped.

When I prepare the netting, I make sure I allow not just enough to cover the space, but also enough space for the young seedlings to grow without squishing up, and then growing through, the netting. Otherwise, when you come to take the netting off, you'll pull out the seedlings. I fold under the extra netting and pin that down, then unfold it once I need to give the seedlings more room. In the picture above, you can see the netting on the bottom part of the picture has been folded over then pinned down.

Below is some netting over some salad seedlings. The glass cloche on the left is because I wanted that cultivar to grow quicker so I would a) have some new lettuce sooner, and b) by trying to get it grow quicker, I'm hoping I'll have time to harvest but also let it go to seed so I can save the seeds before the autumn frosts hit.

The lettuce seedlings (below) are now getting bigger and were just about to start growing through the netting. So I've unfolded the extra netting and have lifted it to give them more space to grow. At this point, they are still a bit young for removing the netting entirely. I've done it too soon in the past and come out the next day to see the seedlings dug up.

The seedlings are now well established and have taken over most of the space, so it's now safe to take the netting off. You can also see how the cloche made a difference, with the lettuce on the right being bigger than that on the left.

The parsnips and beetroot are slower growers, and still too young to take the netting off. It will probably be another month before they'll be established enough.

When it comes to what materials to use, as you can see, I have used plastic netting. I've had this same netting for years and it just last and lasts. Netting is also easy to water and rain through. Because these beds are permanent, I'm cutting the netting to suit each bed, and when I take it off, I'll pin a note to the netting before putting it away, noting which bed it fits for when I need to use it next time. Yes, I'm organised  :)

To hold it down, I use steel ground pegs (see right). Again, these last forever. You could obviously use other similar tools. Some people use old soft drink bottles as individual cloches that protect and encourage germination and growth. I've tried this but found I had to lift them to water the seedlings, and that was just annoying.

I have tried tricks like using hot chilli powder spread around young plants, putting in lots of sticks to keep cats off etc. These can work a bit, but you have to reapply the chilli every couple of days and after rain, and a determined cat can work around sticks. I know, my cat is quite determined!

In the end, I've found the netting and ground pegs keep all creatures off, as well as safe from being trapped under the netting, and my seedlings are protected until they have grown up enough to go net-free.

Looking from the kitchen garden back towards the house

Thursday, 12 March 2020

Crop rotations: the basics for urban growers

My kitchen garden and forest garden border now. The raised beds currently have garlic,
broad beans and corn salad. Now it's warming up, I can start more seed sowing
and really get the season going.
 
When I published my post on my crop rotation plans for this year in January, I got a lot of interest, particularly from people on Mastodon, who asked me a number of questions. So I thought I'd write a post covering the basics as my contribution to Solarpunk Action Week. The focus is on urban growers, as that's from where my experience comes.

Why rotate your crops?
Or, do you have to rotate your crops, even in a small garden? Yes, yes, you do.

The key principle of crop rotation is that you rotate plants of the same botanical family, which are prone to the same soil-living pests and diseases, and should not be grown in the same spot every year. The aim is to prevent the build-up of soil borne problems, such as club root, white rot, and eelworms, which often have no means of control (1).

If you continue to grow the same few crops in your garden or allotment, you risk a build up of diseases in the soil that might take years to get back under control. Particular diseases include potato cyst eelworms which affects potatoes and tomatoes, and club root which affects brassicas. Of course, in smaller gardens, disease can spread to other soil areas. Best practice is to do what you can to reduce the chance of this happening.

The other key reasons to rotation your crops is for nutrient availability/soil fertility. Vegetables have different nutrient requirements, so moving them around the growing area helps to avoid nutrient depletion in the soil (and remember, you'll be adding compost and manure/green manure each year to also improve soil fertility). Furthermore, rotating crops with alternating deep- and shallow-rooting vegetables, improves soil structure.(2)
A wooden raised bed sitting on top of acid soil.
The raised bed is filled with compost, giving it an alkaline-neutral pH. 

Does soil type (pH) matter?
The pH in soil matters because crop rotations are needed for annual vegetables, which won't grow in acid soil. A pH of 7.0 is considered neutral. An acid soil has a pH value below 7.0 and above 7.0 the soil is alkaline.

When it comes to perennial vegetables, few will have much of a problem with a slightly acid soil (pH 6-7) and some will be ok in pH 5-6. Below pH 5, you can only grow acid loving fruit and vegetables, such as most fruit, including blueberries and strawberries, or acid tolerating perennials such as sorrel.

If you have heavy acid soil (pH 5 and below), as I do, then building raised beds is the way to get around this to grow annual vegetables. My raised beds are 40cms high or more, allowing me enough depth to grow any type of annual vegetable.

Basic crop rotations
Crop rotations are usually practiced on a 3- or 4-year plan. If you have the space, plant your crops on a 4-year plan. For smaller spaces, go for a 3-year plan as a minimum.

For a simple 3-year crop rotation, divide your space into 3 sections or beds, then plant:
  1. Root crops (including potatoes, carrots, beetroot, garlic, onions and parsnips). You could include tomatoes in this group to keep the solanum family (potatoes and tomatoes), together.
  2. Brassicas (including cauliflower, broccoli, kale, radish, kohl rabi and cabbage).
  3. Legumes (peas, broad beans and beans). You could add the cucubits (pumpkin and squash) and vegetables that don't really have a group, such as corn and lettuce, here.
For a simple 4 year rotation, you would use the above, but separate out potatoes and tomatoes into their own group.

The garlic grew in this raised bed last year. This year I have created sections within this, and it
will contain a mix of broad beans, climbing French beans, squash and courgette, parsnip and beetroot.

However, even a basic crop rotation doesn't stay quite this simple, because plants have different seasons in which they grow. You plant garlic and broad beans in autumn and they'll be in their spaces from November to the following July-August. For example, one bed might have the following 4 year rotation:

Year 1: Broad beans Spring and Summer, then winter salads and green manures in Autumn and Winter.
Year 2: Peas, courgette and squash (the peas grow up, the courgette and squash underneath) for Spring, Summer and into mid-Autumn. Then plant garlic from mid-October, which will be  that will be there from October to the following July.
Year 3: Garlic up until mid-Summer, then salads and green manures for Autumn and Winter.
Year 4: Potatoes from Spring until Autumn.

After year 4, you return to year 1 and start again.

This photo shows an overview of a previous garden in mid-summer, 2015, which ran on a 4-year schedule. You can see how much you can fit into a small urban garden. The raised beds have been divided into roughly a metre squared sections, with different annual vegetables growing in each. The same view looked different next year as the crops are rotated.

Below are the plans I have, using a 3-year crop rotation cycle. Visit my post on crop rotations for my garden to see more detail.

Detailed crop rotations
Here's an example of crop rotations for a larger amount of beds, from a previous garden. This also includes a larger amount of crops, including brassicas and solanums. The beds were a mix of 3 smaller beds (1-3), and two long beds (4-8 and 9-13). The long beds were broken up into sections in order to make it easier to plan for crop rotations. This meant I could go with a 4 year rotation plan.

This is another photo from 2015, more clearly showing the different vegetables growing in different sections. In this space is: garlic, potatoes, climbing French beans, broad beans, parsnips, and carrots under white netting.

Final thoughts
You don't even need to start of with making big crop rotation plans as I do (I'm a bit of a nerd in that area). As long as you keep a record of what you plant, and where, each year, you'll be fine. Crop rotations can be flexible, just keep botanical families together. You can mix botanical families, but move them around the beds/rotations, together.

* * * * *
My thanks to Alison from Backyard Larder for information regarding growing perennials in acid soil.

References
1. Growing fruit and vegetables on a bed system the organic way, Pauline Pears, 2004, p25.
2.  Encyclopedia of Organic Gardening, editor Pauline Pears, 2001, p301.

Monday, 27 January 2020

Planning the crop rotations for the kitchen garden

The raised beds that form the kitchen garden.

The new growing season is fast approaching. As of this year I have my full complement of raised beds for growing edibles in, so I thought I better work out a crop rotation plan.

This is the layout, where I have numbered each section or bed, to make it easy to plan in order to know what crop is where.

As I have a smaller garden, I've decided to go for a 3 year rotation plan instead of a 4 year plan. I'll be going into detail about this in a future post(1). Here are my 3 year rotation plans.(2)

For my garlic, the plan is to only grow a larger number which I can then share, every 3 years. I may also grow some extra food in pots as well, depending on energy levels etc.

I have allowed for sowing green manure at different points in the year, and I'll continue to add some well-rotted manure and compost to the beds, as needed.

I'm not growing anything from the Solanum family (potatoes and tomatoes), and the only thing from the Brassica family (i.e. cabbages, cauliflower, broccoli) will be Kohl Rabi. In general, the Solanum and Brassica families require a lot more work than I have the spoons to manage. I've grown Kohl Rabi in the past and found it wasn't overly impacted by the white cabbage moth, so hoping that will continue, given they aren't easily available in the shops.

The asparagus, being a perennial, isn't part of the crop rotations as since it will stay in that bed for the next 20 years or so.
Looking at the kitchen garden beds from a different angle.

I suspect I may end up amending my plans as I go along, depend on my health. But having the crop rotations worked out in general, makes it easier manage what to sow where. Now, I'm just waiting for Spring!


* * * * *
  1. I'm putting together a post sumarising crop rotations (the reasons for, etc) for Solarpunk Action Week  (8th - 14th March). If there is an issue you'd like to see included, leave your request in the comments below.
  2. If you would like to see these in more detail, I've uploaded them to Scribd.

Friday, 30 August 2019

Garlic giveaway 2019

Update Thursday 5th September 2019
This offer has now been oversubscribed, so I can not take any more requests

Garlic drying in the sun

 My garlic did really well this season. I've sorted through it, what I'm keeping to sow in Autumn, and what I'm saving to eat through the coming year. And I have enough to also do a bit of a garlic giveaway!

I've included some basic info below, but if you'd like to know more about the individual varieties, do take a look at my Garlic Record. If you would like to know more about growing garlic in general, please read my Spoonie Veg: garlic post first.

As there is only 2 packs (each pack contains 5 cloves) available for each variety, you can choose up to 2 varieties you'd like to try. Or I can choose for you if you're not bothered. Then email me your address details to: jgp @ cooptel.net. I plan to send these out in batches, during September. Note: if I get inundated with requests(!), then I might reduce it to 1 variety per person, so more people have a chance to try them.

Due to postal restrictions, this giveaway is only available to people in the EU/UK. This offer is available until 22nd September 2019, and is on a first-come, first-served basis. And yes, this is a free offer :)

Garlic ready for harvesting, at the end of July

Varieties available
Unless otherwise denoted, the variety has a medium flavour, and will grow ok in pots.

Georgia Fire: storage 4 months.

Martin's Heirloom: storage 5 months.

Metechi: medium-strong flavour, storage 5-6 months, not happy being container grown.

Music: storage c. 5 months.

Persian Star: storage 4-5 months.

Rosewood: storage 5-6 months

Silver Rose: 6 months, not happy being container grown.

NOW GONE Susan Delafield: storage 6-8 months, this is the best variety if you want to grow in containers.

Apart from Silver Rose, which is a Softneck garlic, all other varieties are Hardnecks (see below). All can be sown in Autumn (October/November).


General information
Hardneck garlic: Allium sativum var. ophioscorodon: always produces a flower stalk (called a scape, see photo at the bottom of the post), is considered to have a stronger flavour, and is considered to have shorter storage qualities.

Softneck garlic: Allium sativum: doesn't produce a flower stalk unless stressed, has better storage qualities.

Soil: alkaline to neutral soil. Do not grow in acid soil. Most don’t do as well in heavy clay, garlic needs decent drainage.

Storage: the length of storage time is based on the conditions I have stored the garlic (more about this in the Spoonie Veg: garlic post).

Container growing: you can grow garlic in containers. I found 3 cloves per 10 litre pot gave me the best harvest. See my Container grown Garlic experiment post for more information.

Posts about growing garlic:
Spoonie Veg: garlic (for an overview of growing garlic)
Container grown garlic experiment (optimal conditions for growing in containers)
Garlic scapes (for Hardneck garlic varieties)
Getting the garlic in (sowing garlic in Autumn)
Garlic Record: my record of growing these garlic varieties since 2010. It gives more detail on the growing of each variety
Garlic growing back in June, with a garlic scape, which is edible too.


Wednesday, 17 July 2019

New veg beds - aka finally making a decision on the final layout of my kitchen garden

The kitchen garden?

Not an inspiring photograph, is it? I mean, yes, you can see my slowly developing Forest Garden Border around the edges (the blueberries are nearly ready!), and some raised beds with garlic. But the lawn dominates. However, not for much longer.

I've always intended that this area of the garden would become my kitchen garden, as it gets the most sun all year around. I just hadn't been able to make a decision about the design layout. I've played around with a number of layouts over the last few months, and I've finally came to one that I both liked, and that I felt maximised the use of the space. And here's the plan:

Base map: showing the shape of the design clearly

I view it as a geometrically-shaped flower.

The design has been very carefully measured a few times, and I'm certain that it will work. And I must thank Andrea, my gardener, who helped me with the final measuring out and design tweeks.

 Final design with all the careful measurements

Once again, I'm going with straight lines. That's because straight lines are so much cheaper to build. I plan on adding some plants, such as creeping Thyme, along the paths, as well as some other low growing herbs and ornamental plants, which over time will help break up the lines.

The beds will be made sleepers again and will also be two levels high. As I've mentioned before, I have acid soil, so I need to build the soil level up with alkaline/neutral compost if I want to grow vegetables. For the paths, we will be putting down a permeable membrane, and will then add purple shale on top. I've used this method in the past and I know it works well and looks good. 

The obelisk sitting in the middle of another raised bed during last winter.

I'll be moving my Obelisk from it's temporary position (above) to the centre kitchen garden bed, which will add some height and year round interest. And of course, it will be good for growing climbing french beans and peas, with cut flowers, including sweet peas, on alternate years.

The landscapers will be here next week! And I've just ordered the nearly 5 tonnes of compost to fill the beds. So it's all go for my new kitchen garden borders.

Thursday, 6 June 2019

Garlic scapes

Garlic scapes grow on Hardneck Garlic, and occasionally on Softneck Garlic (usually if stressed). If you aren't sure what type of garlic you are growing, you'll know if it starts producing a scape, which develops around late May and early June in the UK.

You need to remove the scape as otherwise the garlic plant will put all it's effort into creating 'bulbils' (miniscule bulbs) in the scape, as the expense of the bulb in the ground.

1. A garlic scape just developing.

2. The scape has further developed and is leaning over.

3. The scape has now turned into a hook.

You want to snap off the garlic scape as soon as you notice it. This is because the plant will put all it's energy into developing the scape, at the expense of the bulbs in the ground. The scapes turn into flowers that produce 'bulbils', tiny bulbs, which are interesting per se, but not if you want to actually harvest some garlic bulbs!

4. Snap the scape off at this point.

5. The scape section left of the plant may still grow a little more, but will then stop, viz:

6. Don't waste the garlic scapes, as they can be eaten!

A lot of people make Garlic Scape Pesto (think normal pesto but with garlic scapes included). However, I tend to just chop it up and add it into whatever I'm cooking at the time, such as omelettes or a curry. You can add it into any dish you might add garlic to. The Garlic Farm have a good list of suggestions if you want further inspiration. The scapes have a milder flavour compared to the bulbs.

So, if you notice these developing on your garlic, now you'll know what to do with them.

Updated: 1st June 2020

* * * * *
If you would like to know more about growing garlic, do check out my Spoonie Veg: Garlic post.


Tuesday, 7 March 2017

Reviewing my permaculture designed garden

Mid-Summer 2016

In 2013 I made a permaculture design for my garden, which was implemented at the end of the year. Now that I'm leaving this garden, I thought it would be useful to review the design. Did the design work? What was it's flaws? Are there any learning points that I can take with me when I design my next garden?

Did the design work?
Well yes. And no. First the yes.

The garden when we first moved in

The garden is a small urban, east-facing garden measuring approximately 12m x 4.5m. It was just grass and leylandii when we moved in, and the aim was to turn it into a small productive kitchen garden with borders for ornamentals, herbs and a few fruit trees. I observed the garden throughout 2013, monitoring light and shadows, looking at the soil (heavy acid clay!) and thinking about how I could put in a rainwater collection system. I decided on the layout in November and the design was implemented in December. I hired a landscape gardener to do all the hard landscaping, and then I took it from there.


2014 was my first full growing season with the new design. Having spent 2013 observing and recording, via photos, how the sun moved across the garden, I saw just how well that work paid off. The height of the two long raised beds, 45cms high, meant that these beds captured 6 hours of sunlight a day from April to September, plus a few hours each day March and October. From November to February there was limited sunlight, and one long bed was closer to the north-facing (right) side of the garden, so I only ever grew veg like courgettes and tomatoes in the single beds (next to the garage) or the middle long bed, which got good sunlight from March to October. This may seem a lot of detail, but it was really important as it extended my growing season in that part of the kitchen garden by 6-8 weeks.
July 2015

Given the aim to maximise the space in which edibles could grow, the design was a success. In 2014 and 2015 I grew a mix of veg, including potatoes, tomatoes, pumpkin, courgettes, parsnips, carrots, broad beans, kohl rabi, fennel, sorrel, French beans and brassicas. I also had strawberries and plenty of herbs.

My young fruit trees, Morello Cherry, Damson, Greengage, grapevine, and Quince in the front garden, settled in well, though it was 2016 before I got my first crop of Damson and Morello Cherry. This was expected as they were only young trees when planted. The Greengage and grapevine haven't yet fruited; I suspect they will this year, once I've moved! And the Quince started developing fruits twice, but then they dropped before being fully grown, possibly because they needed more watering than I gave them.

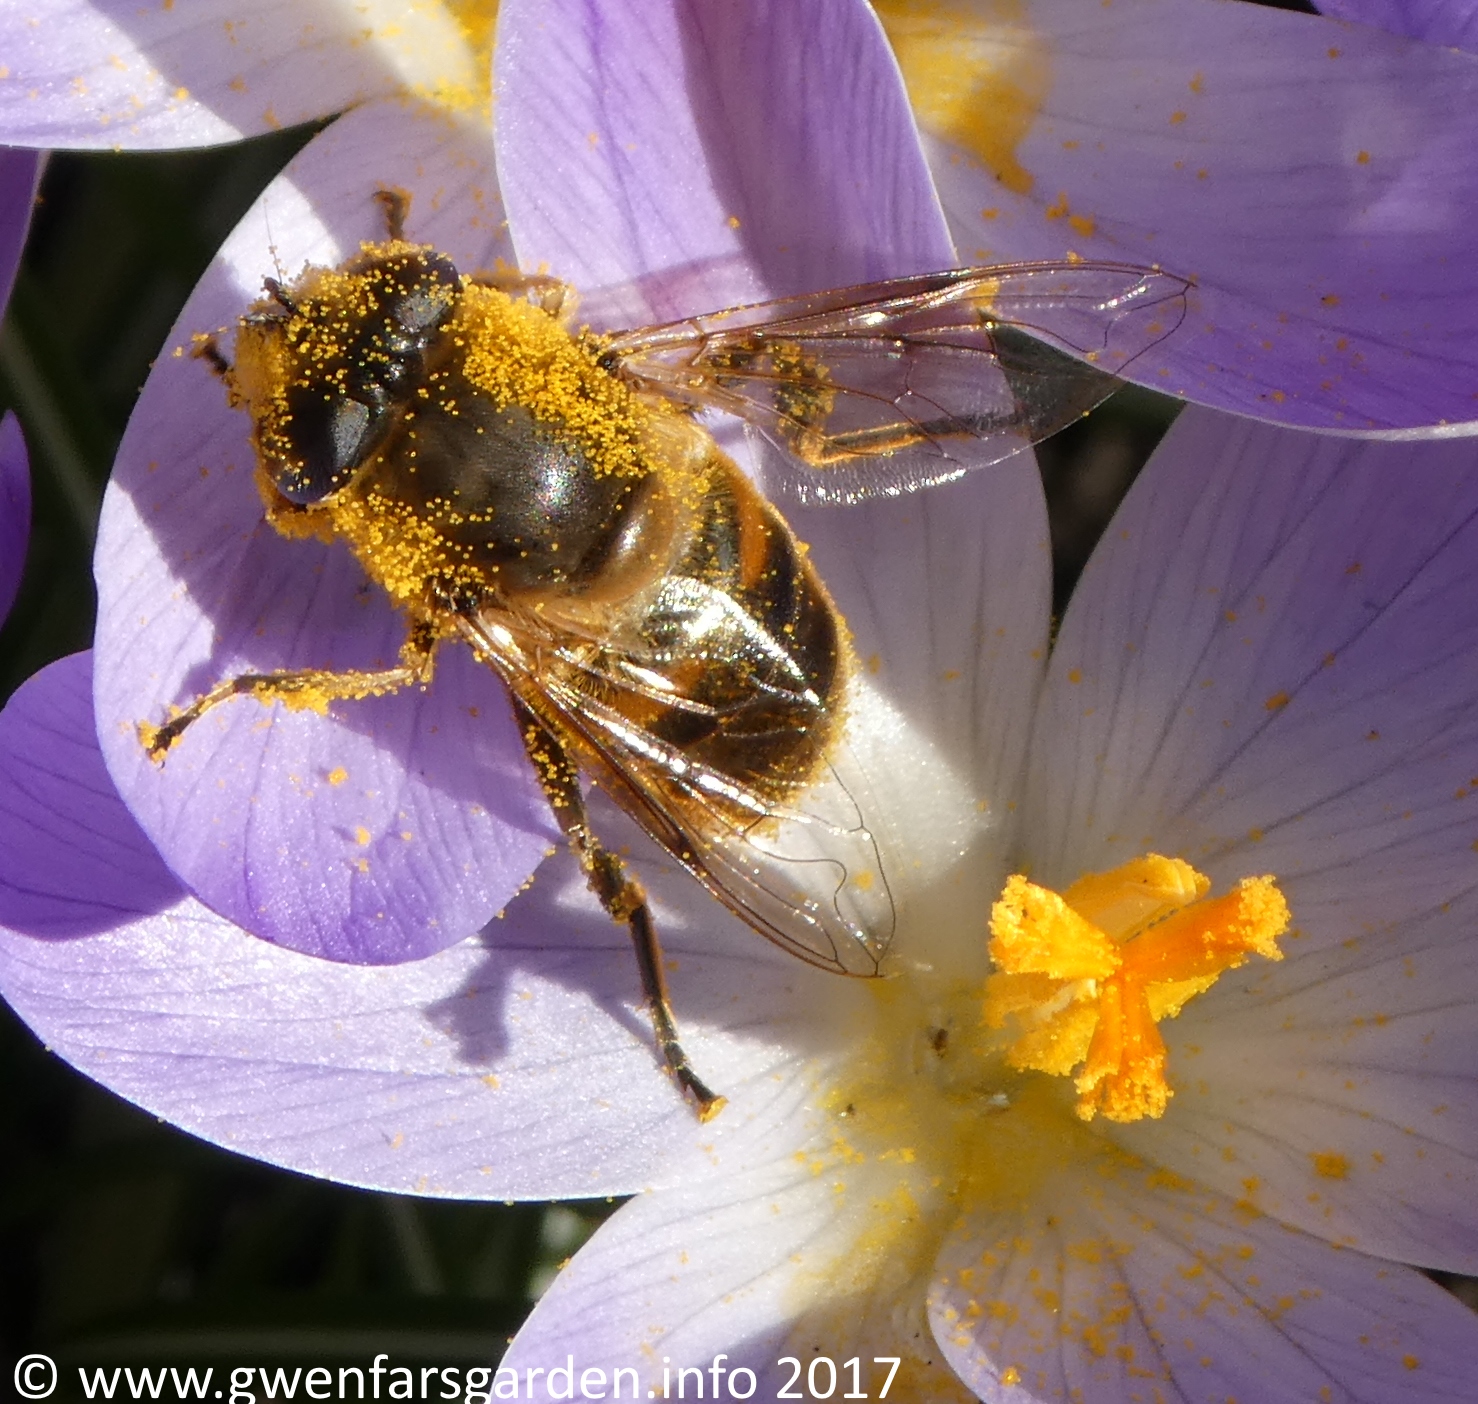
The ornamental borders, with a mix of perennials and some annuals, offered lots of beauty for me and plenty of nectar for bees, hoverflies and butterflies.

In this context, I achieved what I set out to do when I implemented the design. However, there is a 'but'.

What were the flaws of the design?
The first problem that arose was during 2014, when we had quite a wet Spring and Summer. When getting the garden landscaped, we had removed the original grass, rotovated and added in a good mix of sand and topsoil to help improve the drainage of the heavy clay soil. The Spring rains came and
one area of the Long Shady Border (ornamental) became waterlogged, to the point that water was sitting on the surface for weeks.

Waterlogged

After some investigating we worked out the problem derived from the water collected from the garage roof. The previous owners had put in guttering and downpipes, but nowhere for the water collected to be directed. So it just increased the water table until it collected in what turned out to be the lowest point in the garden. Whilst we had known the garden was on a bit of a slope and had it more leveled out when we got the landscaping done, because it hadn't rained heavily during 2013, we hadn't be able to observe how the water would move across, and then sit in the lowest point.

Acer palmatum 'Sango-kaku' thriving in its new position

Some plants had to be quickly moved, such as Acer Palmatum 'Sango-kaku' and  Heuchera, who would rot in these conditions. Some, such as Polemonium caerulem, Astrantia 'Hapsden Blood' and Amsonia tabernaemontana didn't mind having their feet wet, so stayed and thrived. In fact I turned the problem into a solution, by making that area a bog garden. I added in some plants such as Ligularia and Iris sibirica which liked wet roots.

Ironically, once I finally had the funds in early 2016 to put in a 1000 litre rainwater collection tank (right), which took water that fell onto the garage roof, the waterlogging problem was largely removed. It's still a damp area, but no longer waterlogged, and boggy shade-loving plants thrive.

The waterlogging was a problem that I was able to resolve. The second problem, however, didn't have an easy solution.

I was diagnosed with the chronic illness, ME (Myalgic Encephalopathy), in June 2013, although we later realised that I had probably had it for many years previously, slow onset ME. The key symptoms I have include: severe and debilitating fatigue, painful muscles and joints, disordered sleep, and poor memory and concentration. It was in 2012/13 that it was really making life difficult, and by 2013 I had stopped working. As yet, there is no cure for ME.

Morello cherry

When I designed the garden, I designed it to maximise growing food. This was my focus, to the point, I realise now, that I had tunnel vision. Everything was about growing food, and I didn't at all think about how my health might impact on my ability to garden. I knew intellectually and physically, I had ME, of course, but at this point I was still in denial about quite how much the illness was effecting my life.

I had stopped paid work, but that had been partially planned in our move from Oxford to Sheffield. We made a lifestyle change, moving North where houses are cheaper, having a couple of years to take a bit of a break before returning to full-time work. The idea had been for me to explore gardening/growing-related options during the period. This didn't get very far, as I found I had little energy for doing even the most basic daily tasks. When taking a shower exhausts you for hours, you have a problem.

Going to seed, unintentionally

By October 2014 I realised the problem was really effecting my ability to garden. I had lots of French Beans to pick. In fact it was one of my best years growing Climbing French Beans. But I had no energy to pick them. They ended up sitting on the canes, going to seed.

I was struggling to keep up with all the gardening tasks and getting quite stressed about it. Because I had so little energy, I focused what little I had on growing veg, and left the rest of the garden to itself. Some plants didn't get the attention they needed and died, though the weeds were pretty cheerful. I ended up paying for gardeners to come in and help me.

The overgrown French Beans event prompted me to start blogging a new meme: Gardening with ME. I was beginning to accept that the illness was making growing difficult, so I thought this might help me rethink how I gardened. Over time, I found blogging about the challenges of growing food when you have a chronic illness helped me to come to terms with my illness to some degree.


However, coming to terms with the impacts a chronic illness has on your life takes time, and it wasn't until later 2015 that I realised that I had to give up growing much of the food I had been trying to grow (and remember, this is only a small kitchen garden). I couldn't bare to give up gardening entirely. It was in my blood, my heart, and to stop gardening would be like giving up on life. I had to find a way forward, but how?

Gardening with ME had got me thinking about different ways of growing. I now questioned, could you still grow your own when you have a chronic illness? The answer to this has been yes, but within limits. From this arose a second meme: 
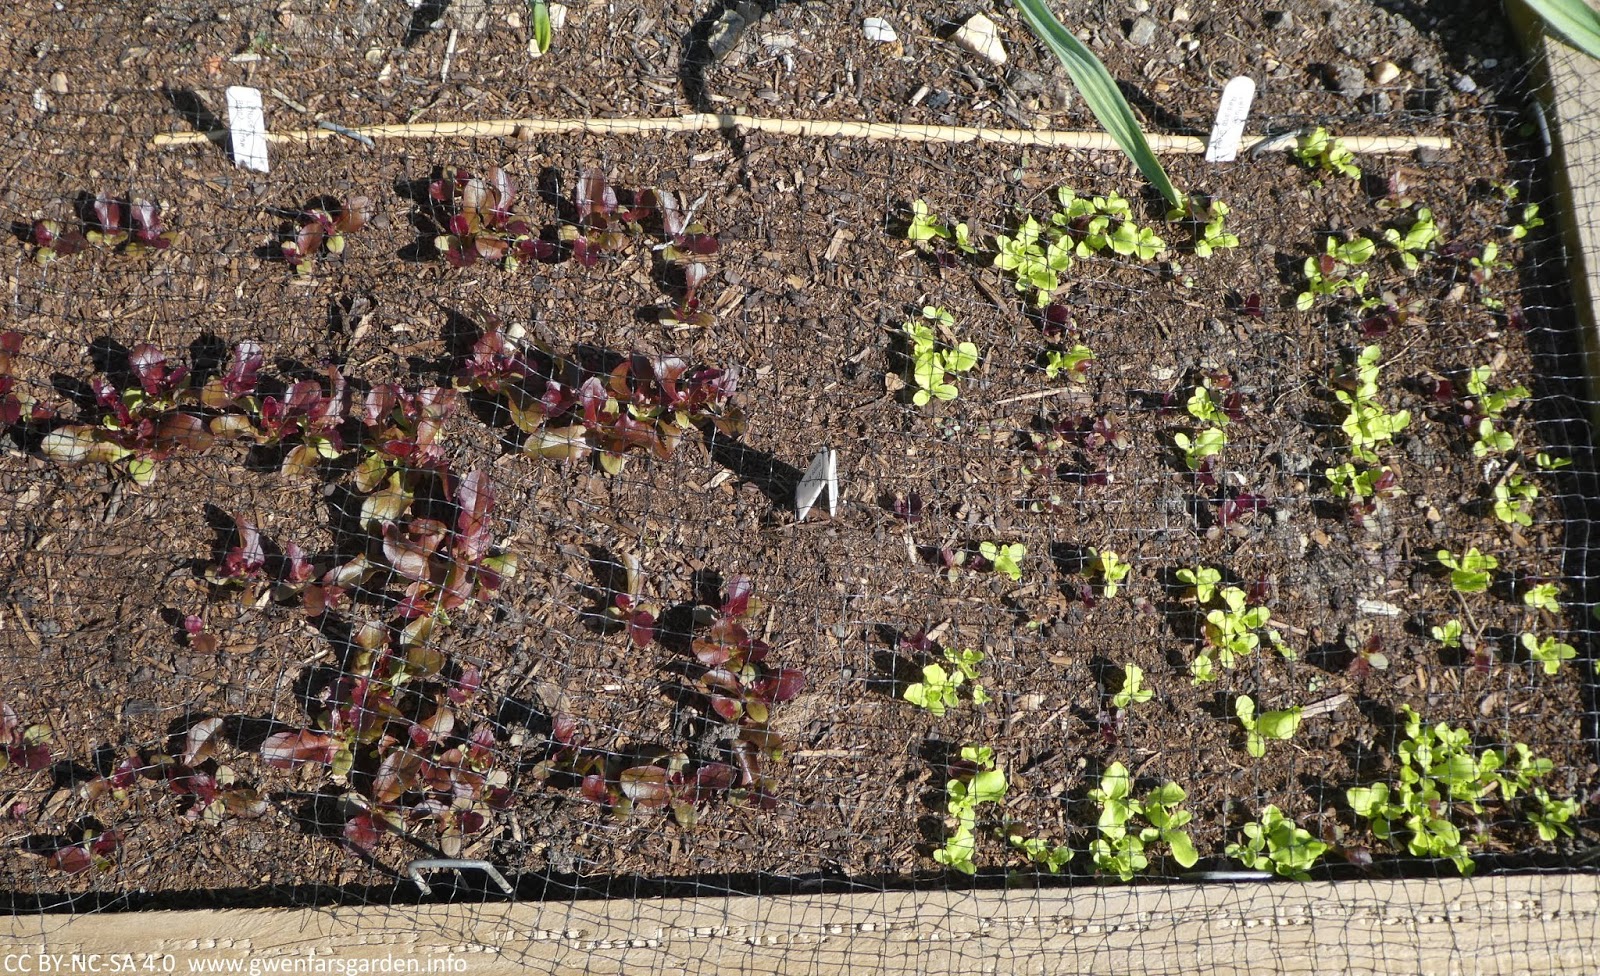
Spoonie Veg. Spoonie Veg looks at the best veg, fruit, herbs to grow when you have limited spoons (energy).

A healthy patch of sorrel

I decided to think about what veg I loved and could get a reasonable yield from. So yes, I grow some perennial edibles, such as sorrel and strawberries, which require few spoons to grow for the harvest you yield. There are a lot more perennials I could grow, but you have to grow food you like! 
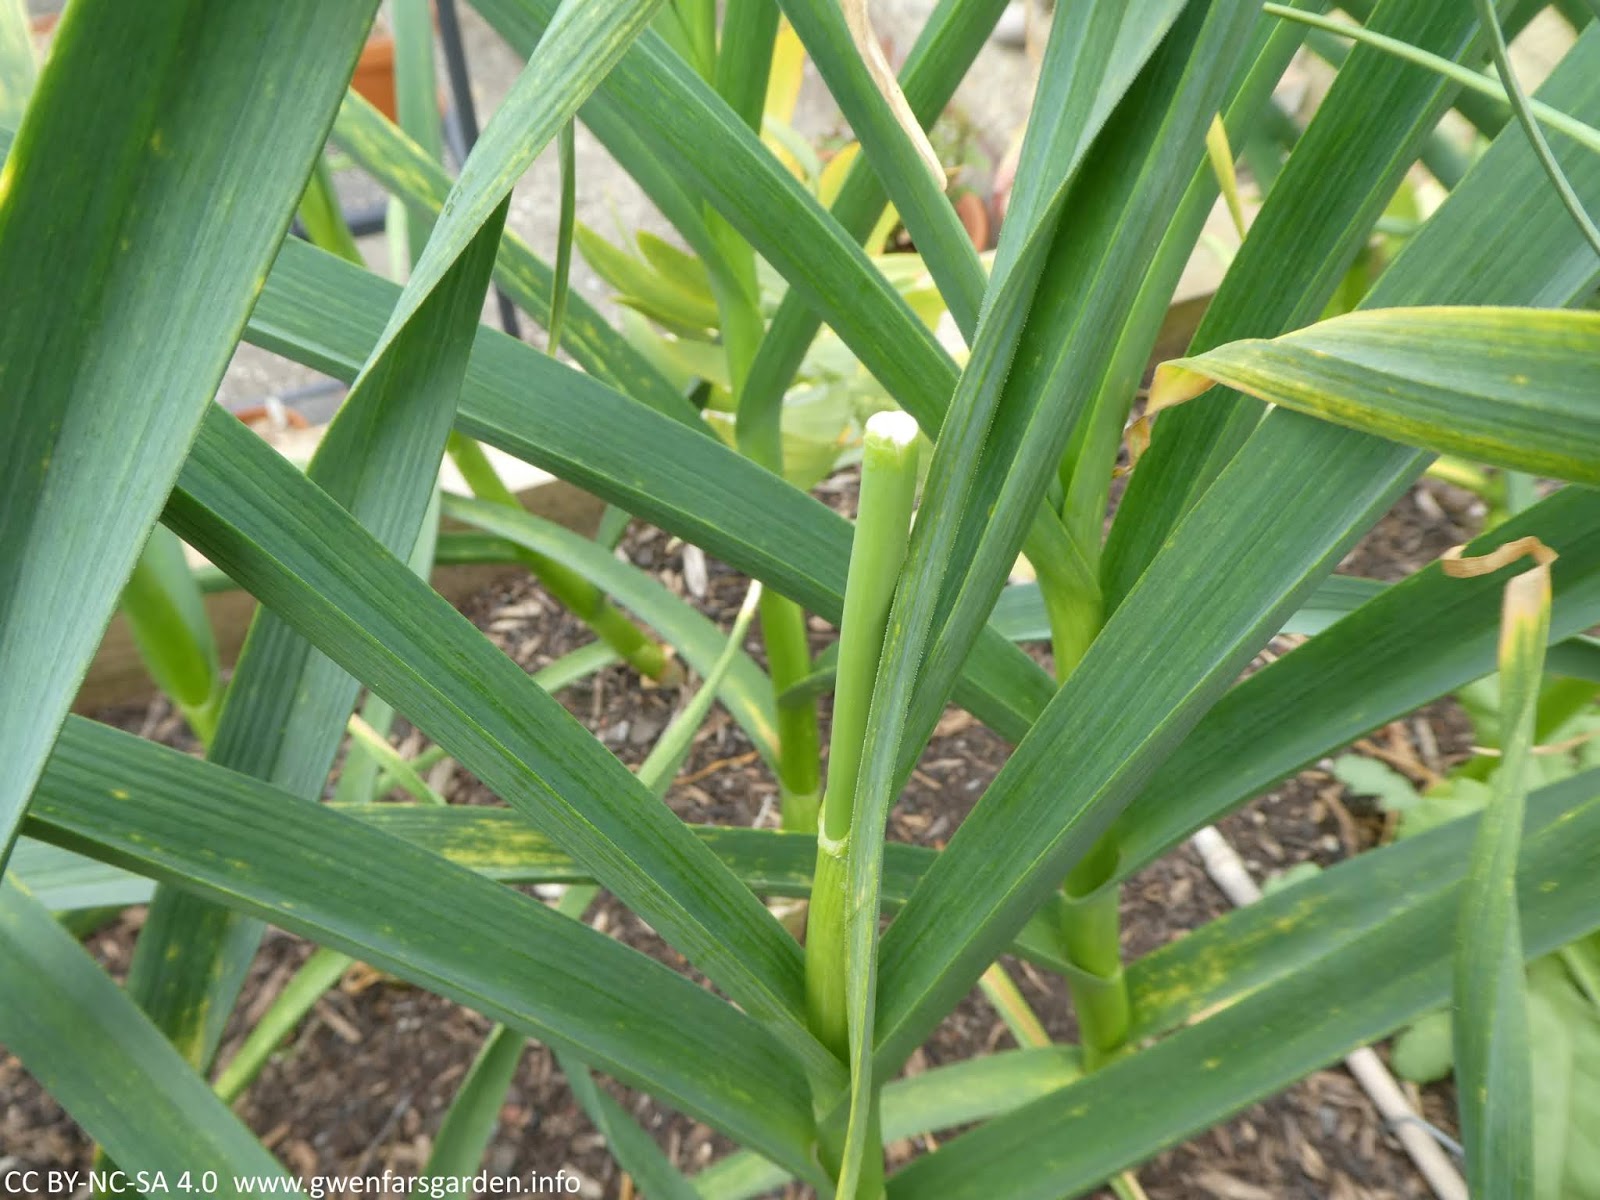
Broad beans were in, as was garlic. The former because I adore them and it's something very hard to get fresh from the supermarkets (pleasure, after all, is a type of yield). The latter because you get a great yield per clove, and because I want to continue growing a selection of unusual varieties of garlic that I've been growing and saving for more than six years. Out is brassicas, which require a lot of attention and management, more spoons needed than I could manage.

Garlic harvest drying in the sun

I suppose you could say I have found a kind of solution to the problem of gardening with ME. Whilst I have managed to make the most of the situation, by not listening to my body, just my heart, I designed a garden that wasn't, in the end, suitable to my needs.

What learning points can I take with me when undertaking designs in the future?
Well, putting in the rainwater collection tank earlier probably would have stopped the waterlogging problem! And it would have saved water, both as a resource and a cost, much sooner. I should also consider including running some irrigation into key growing beds from the rainwater tank in a future design. This would have saved energy, all those heavy trips with the watering can.

But the big learning point is a really difficult one. Difficult, because it means standing back from what you want, and looking at what you need, which are often very different things. Difficult also, because accepting you have a chronic illness means changing how you live. I wanted a bounteous harvest, but I didn't have the health to get there or maintain it. What I now know is that I needed a different garden from the one I designed. It should have been a place to rest and allow my body to breathe. Whilst I have found a way to work around the problem, gardening with ME and focusing on Spoonie Veg, I went through a lot of stress and angst over a couple of years trying to maintain what at the moment, is an impossible dream.

Herb border

The biggest learning point? It cannot be emphasise enough: the importance of listening to your body. As a permaculture designer I have learnt the hard way, the importance of living and designing, realistically in the now.

I am leaving this garden, proud of what I have achieved despite the circumstances. For my next design, I know that the aims of design must be achievable. And it must also be honest.

* * * * *
I'd love to hear your thoughts and comments on your experience, so don't be shy!

About Spoonie Veg    About Gardening with ME

Twitter hashtags: #GardeningWithME #SpoonieVeg

Recent Gardening with ME and Spoonie Veg posts...
 Gardening with ME: some beans
 Gardening with ME: a floral review of 2016
 Spoonie Veg: Broad Beans
 Spoonie Veg: garlic